How to Extract Honey Without an Extractor: 4 Simple Methods That Actually Work
As a small beekeeper, should you invest in an extractor? The answer is: not necessarily. While renting or borrowing extraction equipment is always the best option for preserving your valuable drawn comb, there are proven methods for harvesting honey without specialized equipment.

If you're a backyard beekeeper staring at frames heavy with capped honey, you might be wondering if you really need to invest in an extractor. The short answer: you don't. These simple, equipment-free methods have been used for generations, long before centrifugal extractors existed.
Mechanical extractors are designed for efficiency and scale. But when you're working with a few hives, harvesting foundationless comb, or just getting started in beekeeping, several proven methods let you enjoy your harvest without the expense or storage space of extraction equipment.
An Important Consideration: Respect the Comb
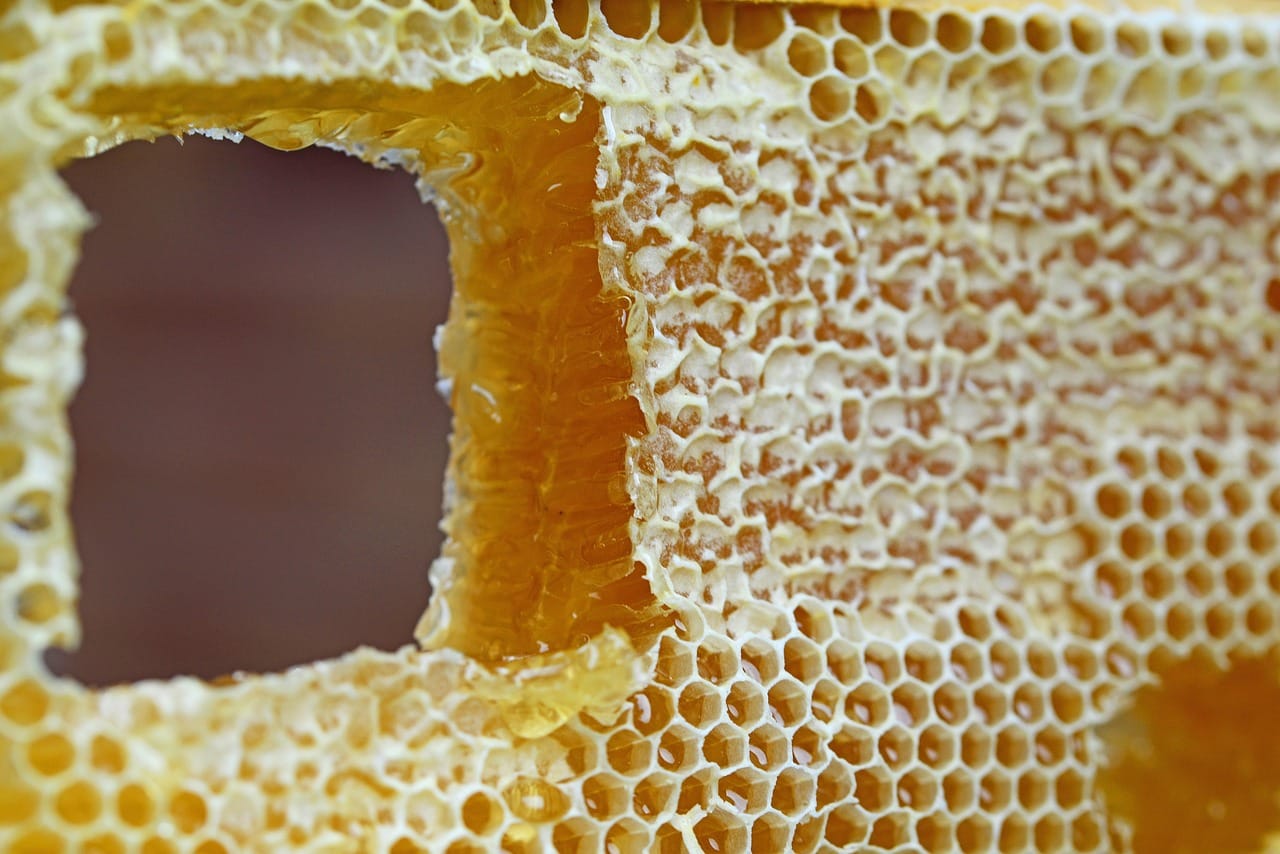
Before we go further, let's be clear about something critical: drawn comb is precious. Your bees invested enormous amounts of time, effort, and energy to produce that wax and build those perfect hexagonal cells. It takes approximately 6-8 pounds (2.7-3.6 kg) of honey for bees to produce a single pound of beeswax. That's not a minor investment. That's weeks of foraging, nectar processing, and careful construction work.
Every crush-and-strain method described in this post destroys that comb. You're essentially asking your bees to start from scratch, which means they'll spend their energy rebuilding instead of storing honey. This matters both from a practical beekeeping perspective and out of simple respect for the work your bees have done.
So before you choose any of these methods, seriously consider renting or borrowing an extractor. Many local beekeeping associations maintain extractors that members can rent for a day or weekend. Some beekeeping supply stores offer rental programs. You might even find a nearby beekeeper willing to let you use theirs in exchange for a jar of honey or just goodwill between beekeepers.
Using an extractor preserves your drawn comb, which means your bees can start filling those frames again instead of rebuilding from foundation. For most beekeepers with standard framed hives, this is the better choice. It's better for your bees, better for your long-term honey production, and often easier once you factor in the time spent crushing and straining.
The methods below are solutions for specific situations: when you're working with foundationless or top-bar comb that can't be extracted anyway, when you're deliberately producing comb honey, when you're harvesting burr comb or small quantities, or when extraction equipment isn't accessible. But they shouldn't be your default choice just because you want to avoid the hassle of borrowing equipment.
When These Methods Actually Make Sense
Now that we've established the importance of preserving comb when possible, let's talk about the legitimate scenarios where extractorless methods are your best, or only, option.
If you're running top-bar hives or working with completely foundationless frames, extraction isn't really possible anyway. That delicate comb lacks the structural integrity to survive spinning, which means crush-and-strain is your default method from the start. This isn't a compromise. It's the standard approach for these hive styles.
You might also be harvesting burr comb, brace comb, or small amounts of honey that don't justify the setup and cleanup of extraction equipment. A few frames of honey from a single hive can be processed quickly with simple methods without the logistics of renting equipment for a small batch.
And if you're deliberately producing comb honey as a premium product, you're intentionally skipping extraction altogether. In this case, the destroyed comb isn't waste. It's part of what you're selling!
Method 1: Crush and Strain (The Traditional Approach)
This is the oldest and most straightforward method for extracting honey, and it's exactly what it sounds like. You manually crush the honeycomb and let gravity do the rest of the work.
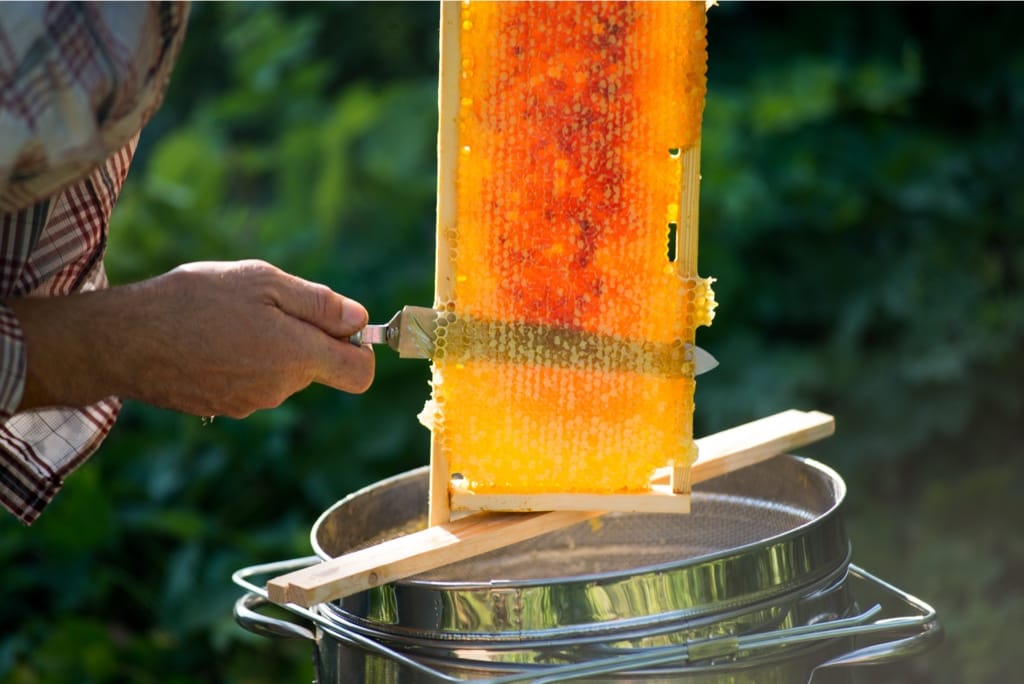
Start by cutting the capped comb away from your frames. Use a sharp knife (a serrated bread knife works well for this) and work over a food-grade bucket or large bowl to catch any drips. Once you've collected your comb, the crushing begins. Break it up thoroughly with clean hands, a potato masher, or even a large fork. The goal is to rupture as many cells as possible to release the honey.
The more thoroughly you crush the comb, the faster and more completely your honey will drain. Don't be gentle here. Really work the comb until it's a mashed mixture of honey and wax. This might feel destructive, but remember that you're essentially converting comb into honey and wax as separate products, both of which have value.
Now comes the waiting. Pour your crushed mixture into a straining setup—this could be a fine-mesh sieve, a paint-strainer bag (new and food-safe, obviously), or even a clean nylon stocking stretched over a container. Position this over your collection bucket and let gravity work. Depending on temperature and how thoroughly you crushed the comb, this drainage can take anywhere from several hours to a couple of days.
You can speed things along by occasionally stirring the mixture in your strainer or gently pressing on the comb with a spoon. Just avoid forcing wax through the mesh. The honey will come on its own schedule, and patience here means cleaner honey with less wax contamination.
Method 2: The Bucket Method (Gravity Drainage System)
This is really an evolution of crush and strain, but with better ergonomics and a cleaner workflow. The concept is simple: create a two-bucket system where honey drains from a perforated bucket into a solid collection bucket below.
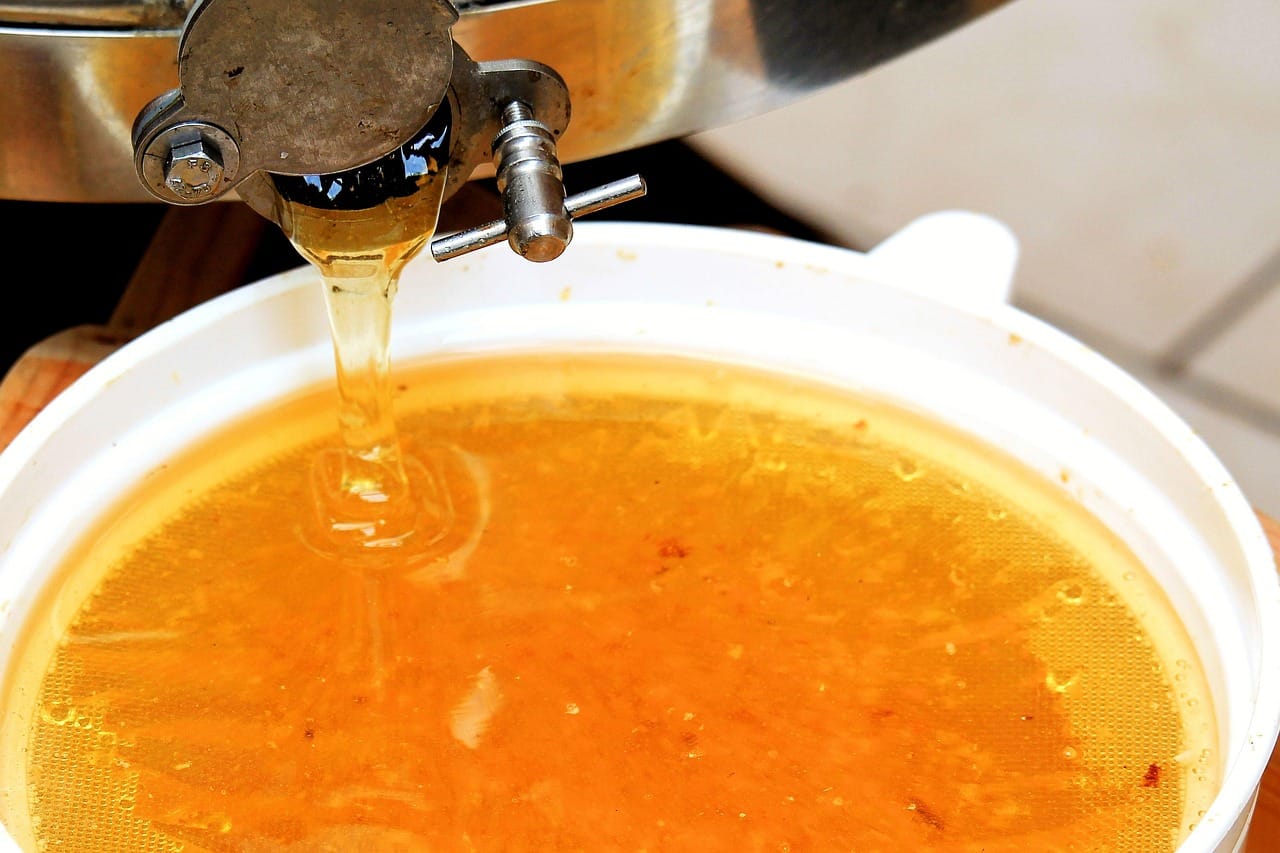
Take a food-grade bucket and drill small holes across the entire bottom. Aim for holes around 1/8 inch (3.2 mm) in diameter, spaced about an inch (2.5 cm) apart. This becomes your drainage bucket. Stack it inside or over a second solid bucket that will catch the honey. Many beekeepers install a honey gate (a simple spigot) on the collection bucket, which makes bottling easier later.
The beauty of this system is that you can crush your comb directly in the top bucket, then walk away. Gravity does all the work, and the separation between crushing and collection means less mess. The crushed comb stays contained in the top bucket while clean honey accumulates below.
This method works particularly well when you're processing multiple frames over a harvest day. You can crush comb in batches, letting earlier batches drain while you work on new frames. The setup is also easy to clean and store between harvests. Just rinse both buckets and stack them away until next year.
Method 3: Simple Press Method
If waiting for gravity feels too slow, pressing offers a faster alternative. The principle remains the same, though. You're forcing honey out of crushed comb, but you're applying mechanical pressure rather than just waiting for drainage.
Start by crushing your comb as thoroughly as possible, just as you would for the crush-and-strain method. Then load this crushed mixture into a clean cloth bag. Cheesecloth folded several times, a mesh nut-milk bag, or even an old pillowcase will work well.
The pressing itself can be as simple as squeezing the bag with your hands over a collection container. This is messy work, so do it over a large bowl or bucket, and expect honey to get on your hands and forearms. For larger volumes, a basic fruit press or wine press can apply consistent pressure without the arm fatigue.
After pressing, you'll still want to strain the honey through a fine mesh to catch any wax particles that squeezed through the cloth. The total time from comb to jar is significantly smaller compared to passive drainage methods.
The tradeoff here is that pressing tends to incorporate more wax into your honey, which means more careful straining at the end. If you're working with limited time or want to bottle honey the same day you harvest, pressing gets you there faster.
Method 4: Skip Extraction Entirely (Comb Honey)
Here's the method that's not really a method at all: don't extract. Instead, harvest and use comb honey directly.
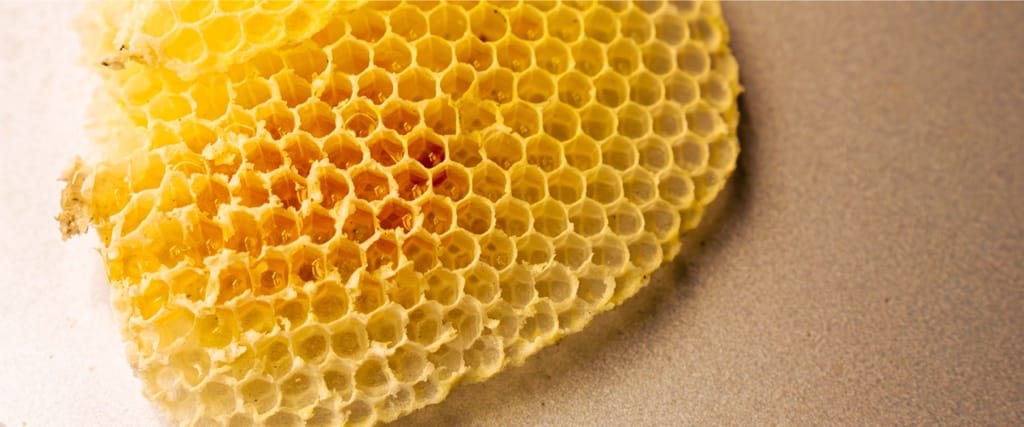
This approach requires some planning from the start of your season. You'll need to use foundationless frames or thin cut-comb foundation. You'll also want to manage your hive to encourage the bees to build clean, white comb. When harvest time comes, you cut the best sections of fully-capped comb from your frames and package them as they are.
From a beekeeping perspective, selling comb honey means you're trading comb (which costs your bees energy to rebuild) for premium pricing. Comb honey typically commands a higher price per weight than extracted honey, which can offset the loss of that drawn comb. Your customers are getting honey in its most natural form, complete with the beeswax comb, pollen particles, and propolis that gives comb honey its distinctive character.
The beauty of this method is what you avoid: no extraction equipment, no sticky cleanup, and no waiting for honey to drain. You harvest, you package, you sell. It's the most direct path from hive to customer, and many consumers specifically seek out comb honey for its authenticity and unprocessed nature.
Choosing the Right Method
The right method for you depends less on theoretical efficiency and more on your specific circumstances. If you're running just a hive or two and experiencing your first honey harvest, crush-and-strain is an option. It requires minimal investment (you probably already have everything you need in your kitchen) and it teaches you the fundamentals of honey harvesting without overwhelming you with equipment.
The bucket method makes more sense once you're regularly harvesting multiple frames at a time. That initial setup time (drilling holes, installing a honey gate if you're going that route) pays off in convenience and it's a cleaner workflow when you're processing larger volumes.
For beekeepers working with top-bar hives or foundationless frames, these non-extractor methods aren't optional; they're standard practice. Your comb simply isn't strong enough to survive mechanical extraction, which makes crush-and-strain or comb honey production your default options from the start.
And if you're thinking about comb honey, consider your market before your harvest. Comb honey sells best when you have direct access to customers who appreciate premium, artisanal products. Farmers markets, local food co-ops, and specialty food shops are your natural outlets. But you'll need to build that relationship before harvest time arrives.
The Wax Question
Every crush-type method shares one significant characteristic: you're destroying comb to extract honey. This matters because drawn comb is valuable. Your bees invested considerable energy to produce that wax and build those cells. When you crush comb for extraction, you're essentially setting your bees back to square one for that frame. I cannot emphasize this enough.
It is a tradeoff you need to consider. Some beekeepers cycle through crush-and-strain methods early in their beekeeping journey, then invest in an extractor once their operations grow large enough that preserving drawn comb becomes economically important. Others, particularly those committed to foundationless beekeeping or producing comb honey, accept the comb loss as part of their chosen approach.
The wax you collect from any of these methods isn't waste, though. Once you've strained your honey, you're left with wax that can be melted down, cleaned, and used for candles, cosmetics, or foundation. Many beekeepers find that selling beeswax products helps offset the cost of new foundation or frames.
Temperature and Timing
Honey's viscosity changes dramatically with temperature, which affects every extraction method we've discussed. Warm honey flows readily while cold honey barely moves at all. That is why most beekeepers time their extraction for the warmest part of the day or bring frames indoors to room temperature before starting.
If you're working in cooler conditions, patience becomes even more important. That crush-and-strain setup that might drain in six hours during summer could take two full days in a cool basement. You can gently warm your straining setup by placing it in a warm room or near (but not too near) a heat source, but avoid anything that might affect honey quality. Never microwave honey or apply direct heat to speed drainage.
Getting Started
Your first honey harvest doesn't require specialized equipment or significant investment. Start with the basic crush-and-strain method using tools you already have: a food-grade bucket, a fine-mesh strainer, and clean hands. Harvest a single frame first to learn the process before committing to extracting your entire honey crop.
Pay attention to what works and what frustrates you about the process. That real-world experience will guide any future equipment decisions better than any advice I or anyone else can offer. Maybe you'll find that crush-and-strain suits your small operation perfectly. Maybe you'll immediately want to build a bucket system. Or perhaps you'll discover that comb honey is exactly what your local market wants.
The point is to get honey from your hives into jars without letting perfect become the enemy of good. Your bees did their part. Now do yours, using whatever method matches your situation, and enjoy the reward of your first harvest.