Your First Spring Hive Inspection: A Beekeeper's Complete Guide
Your first spring hive inspection sets the tone for the entire beekeeping season. Learn when to open the hive, what to look for inside, how to check for varroa mites and diseases, and avoid the common mistakes that can harm your colony.

After months of waiting and wondering, spring finally arrives. The first inspection of the season is one of beekeeping's most anticipated moments. It tells you whether your colony survived, how strong it is, and what the coming months might hold. Getting this inspection right sets the tone for the rest of the year.
When to Open the Hive
Patience matters more than enthusiasm here. Opening the hive too early can expose bees to cold drafts and disrupt the cluster's ability to regulate temperature, which can harm developing brood.
Wait until outdoor temperatures are consistently at least 50°F/10°C and bees are flying freely from the entrance. For a quick peek, 55°F/13°C works fine. For a thorough inspection where you pull frames and examine brood, wait for conditions above 60°F/15°C.
A useful natural indicator: wait until daffodils are in full bloom in your area. This tends to align well with conditions safe for inspecting.
The best time of day is between 11 a.m. and 4 p.m. when the sun is strongest and many foragers are out. Fewer bees in the hive means your inspection becomes easier and causes less disruption.
Why does temperature matter so much? Every minute the hive is open, internal temperature drops. Bees maintain their brood nest at approximately 95°F/35°C. When you expose them to cold air, they must burn energy to warm the cluster back up. That taxes an already stressed colony, working hard to build up after winter.
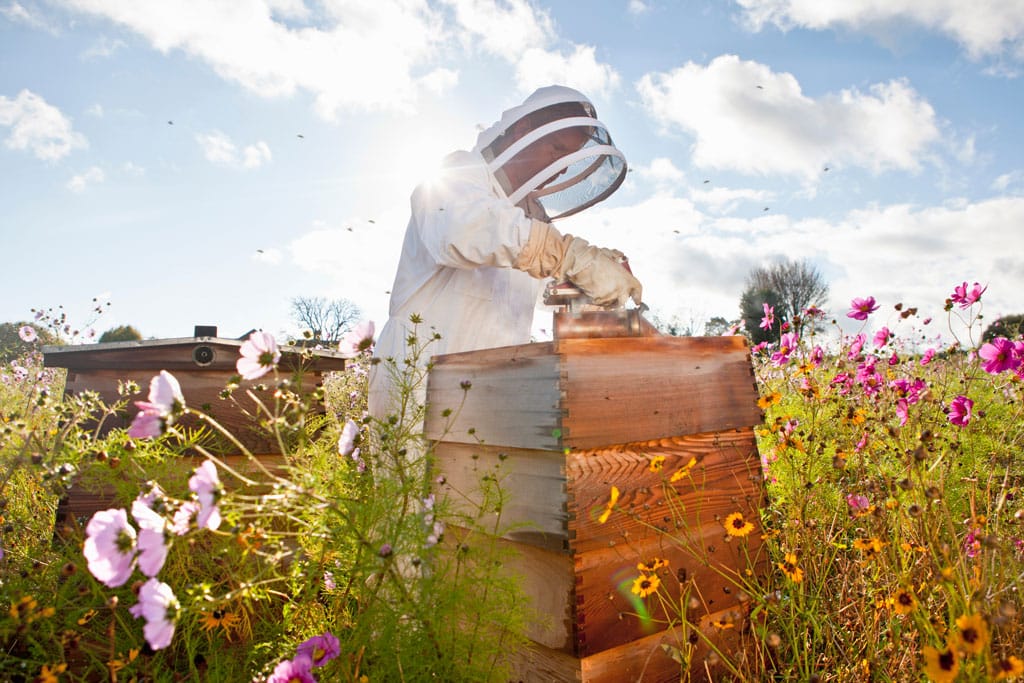
Before You Open the Hive
Stand back and observe the entrance for a few minutes before reaching for your smoker. This simple step reveals a lot about what is happening inside.
Bees coming and going with pollen on their legs tells you brood-rearing is underway. A small number of dead bees near the entrance is normal after winter, but excessive piles could signal disease, starvation, or poisoning.
While you watch, check for cracks, leaks, or damage that may need repairs. Look for signs of mice around the entrance or ants trailing up the hive stand. Mice can cause significant damage to comb during winter, and catching signs early helps you address problems before they worsen.
What to Look For Inside the Hive
Once you open up, you have several goals:
- confirm the colony survived
- assess its strength
- check food stores
- verify the queen is active
- look for signs of disease or pests
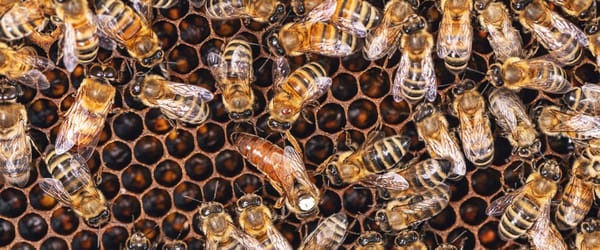
Start by counting frames covered with bees. A hive emerging from winter with seven to eight frames of bees is in good shape. Fewer than four or five frames suggests a weak colony that may need supplemental feeding or, in some cases, combining with another hive.
Finding Evidence of the Queen
You don't need to spot the queen herself (although that's a nice bonus). Evidence of her activity is enough. Look for fresh eggs standing upright in the bottom of cells. These eggs, laid within the last day or two, confirm that your queen was present and active very recently.
Young larvae curled in cells like tiny white crescents also indicate an active queen. Combined with a consistent, solid brood pattern, these signs tell you the colony is queenright and functioning normally.
If you can't find eggs or young brood, don't panic. If temperatures have only recently warmed, the queen may not have started laying yet. Close the hive, wait a week, and check again before concluding something is wrong.
Evaluating the Brood Pattern
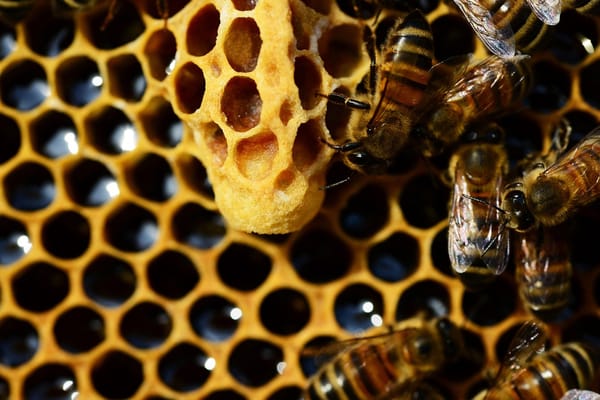
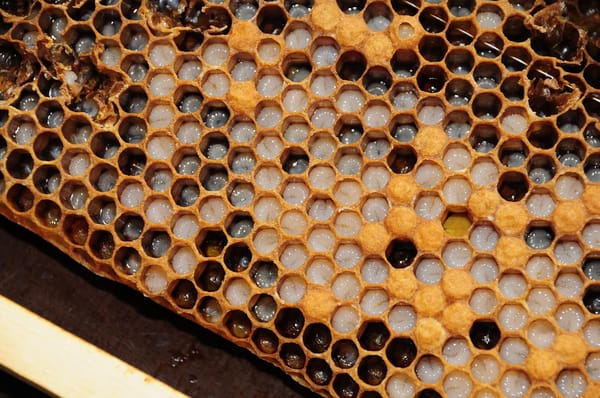
A healthy brood pattern appears as concentric circles of similar-aged brood in a tight formation with few skipped cells. The oldest brood sits in the center with the younger brood radiating outward. Pollen is stored on the edges of the brood nest, and honey or nectar fills the upper corners of the frame.
Healthy larvae look pearly white. Cell caps on healthy brood are convex (slightly raised) and tan-colored. Each cell contains a single egg standing upright at the bottom.
A spotty or inconsistent brood pattern with many empty cells scattered throughout can indicate problems, though the cause is not always the queen. Research found that when queens from colonies with poor brood patterns were moved into colonies with good brood patterns, their laying improved significantly within three weeks. This suggests that disease, pesticide exposure, or colony stress also affect brood patterns. Before blaming the queen, consider other possible causes.
Checking Food Stores
Spring starvation is a common cause of colony loss. Bees consume substantial amounts of honey during spring brood-rearing, often more than beekeepers expect. A colony raising brood in cool weather burns through stores quickly.
Look for at least three deep frames or four medium frames of capped honey. Honey should be stored adjacent to the brood, with pollen nearby. If stores look low, plan to feed before you leave.
Crystallized honey appears as sparkly white dots in cells. Bees can still consume this, so its presence is not cause for alarm. Still, carefully assess overall store levels.
Signs of a Healthy Colony and Warning Signs
A healthy colony in spring has calm, organized bees moving purposefully across frames. Foragers return with pollen, confirming active brood-rearing. Larvae appear healthy and white, surrounded by adequate food stores.
Several warning signs should be looked at.
Gray, yellow, brown, or black larvae indicate disease, chilling, or injury. Cell caps that appear sunken or perforated with small holes suggest brood disease. Two or more eggs on the sides of cells rather than one egg at the bottom may indicate a laying worker, a sign the colony has been queenless for some time.
Unusually aggressive behavior can mean the hive was robbed or attacked by predators. Bees also become more defensive during nectar dearths when they guard their stores more intensely.
Checking for Varroa Mites
Varroa destructor remains the most significant pest affecting honey bees. Spring monitoring is valuable because mite populations grow rapidly once brood-rearing increases.
The spring treatment threshold is lower than the fall threshold. Randy Oliver suggests treating if the infestation exceeds 1% in spring, which means fewer than 2 mites per 100 bees. In early spring, when most mites are inside capped brood cells, counts of zero or one are ideal.
Why such a low threshold? Research by Currie and Gatien (2006) found that colonies with just 2 percent mite infestation in spring produced half the honey or less compared to treated colonies. Mite populations grow at approximately 2.5% per day, so being proactive prevents problems rather than forcing you to react to a crisis later.
Common Bee Diseases to Watch For
Nosema
Nosema is caused by microsporidian fungi and is one of the most common adult bee diseases. Spring outbreaks are typical, particularly after periods of confinement during bad weather. Infection levels rise rapidly as brood-rearing starts, while bees still cannot fly regularly.
Symptoms include dysentery (yellow streaks on the outside of the hive), crawling bees with disjointed wings, and a condition sometimes called spring dwindle, where infected bees fly away to die rather than dying in the hive. Nosema is invisible to the naked eye. Microscopic examination is the only reliable detection method, so sending samples for testing is worthwhile if you suspect a problem.
American Foulbrood
American Foulbrood (AFB) is caused by the spore-forming bacterium Paenibacillus larvae. It is the most destructive brood disease, and its spores remain viable for more than 70 years.
Symptoms include a spotty brood pattern, dark sunken or perforated cappings, sticky ropey dead larvae that string out when a toothpick is inserted, and a foul odor. The only treatment for AFB is the destruction of all bees and comb. Contact your regional apiary inspector if you suspect AFB. Antibiotics do not kill spores, and they are not a solution.
European Foulbrood
European Foulbrood (EFB) is caused by the bacterium Melissococcus plutonius and occurs most often in early spring. Symptoms include yellowish, twisted, dead larvae in uncapped cells and a sour odor. Unlike AFB, which kills larvae after cells are capped, EFB usually kills larvae before capping.
EFB is largely a stress-related disease. Maintaining strong colonies and requeening can help resolve outbreaks.
Chalkbrood
Chalkbrood is caused by the fungus Ascophera apis and produces hardened white or black mummies that resemble chalk. It is most common in spring when the young brood is exposed to low temperatures. No chemical treatment exists, but colonies typically resolve the problem as populations grow in warmer weather.
Feeding Your Bees in Spring
If stores are low, feed immediately. For spring feeding, use 1:1 sugar syrup (one pound of sugar to one pint of water). This ratio stimulates brood development and comb building. The thicker 2:1 syrup used in fall for storage is not appropriate for spring.
Pollen substitute is especially valuable in early spring when few flowers are blooming. Nurse bees require protein to manufacture brood food for larvae. Pollen patties (a mix of dry substitute, cane sugar, and water) can be placed directly in the hive.
One caution: do not feed protein supplements in amounts greater than bees can consume in two days. Excess protein patties can attract small hive beetles in areas where those pests are present.
Swarm Prevention Starts Now
Swarming is how honey bee colonies reproduce, and a strong colony with plenty of food is a prime candidate. Your first spring inspection is the time to start managing swarm impulses before they escalate.
Signs that a colony may be preparing to swarm include elongated queen cells along the bottom of frames, overcrowding, backfilling of the brood nest with nectar, and increased drone production. Queen cells containing royal jelly indicate swarming is approaching.
Prevention focuses on providing adequate space. Add frames of drawn comb above the brood nest when backfilling begins. Reversing hive bodies in mid-February to mid-March (depending on your location) moves empty combs above the brood nest and gives the queen room to lay.
Colonies with older queens are more likely to swarm. Making splits from strong colonies helps distribute resources and reduces crowding.
During spring, inspect every seven to ten days to check for swarm cells. Queen development takes only 16 days from egg to emergence, so weekly inspections are needed to stay ahead of swarm preparations.
Common Mistakes to Avoid
Rushing the first inspection. Opening the hive too early or staying in too long causes stress. Wait for consistent temperatures above 50°F/10°C, and only open hives when temperatures reach 60°F/15°C. Keep your inspection focused.
Neglecting feeding. Do not assume bees have enough stores to last until flowers bloom. Spring starvation kills many colonies that made it through winter. Check stores and feed if they are low.
Ignoring varroa. Mite populations can explode quickly. Test in early spring and treat before populations grow. Waiting until summer may be too late.
Skipping notes. Failing to record observations leads to repeated mistakes. Good records help you identify patterns and improve your practices over time. Note the date, temperature, frames of bees, frames of brood, food stores, and any concerns.
Over-inspecting. Too many inspections stress the colony. Every one to two weeks is generally sufficient unless you are actively managing swarm preparations.
Not providing enough space. Monitor for crowding and add supers before bees run out of room. Overcrowding is a primary trigger for swarming.
Working Efficiently During Your Inspection
Aim to complete your spring inspection in 15 to 30 minutes. Have your smoker lit and ready before opening the hive. Handle frames gently to avoid crushing bees or the queen. Work with purpose rather than lingering.
Take some time to clean debris from the bottom boards, top bars, and lids. Scraping excess wax and propolis makes future inspections easier. Consider removing one to three old, dark combs each spring to keep your equipment fresh.
The first spring inspection answers the question that has been on your mind all winter: how are my bees? With careful timing, focused observation, and attention to the details covered here, you will have the information you need to help your colony thrive through the coming season.